
AWS Application Load Balancer
This week in our Scalable Solutions series we are going to be covering the Elastic Load Balancer (specifically the Application Load Balancer or v2). At Entasis we help our customers build elastic and resilient solutions with performance on-demand. If you need help finalizing your design or implementing your vision please don’t hesitate to reach out to us at sales@entasistech.com. Also if you are just looking to learn more about AWS and you are in the North Dallas area we sponsor the AWS User Group of North Dallas at our offices in McKinney, TX. You can find this on meetup.com.
If you did not catch our earlier articles please take a peek at what we have been up to in this series.
Week 1 – Amazon Route 53 Basics
Week 2 – AWS Certificate Manager
Week 3 – AWS Systems Manager Parameter Store
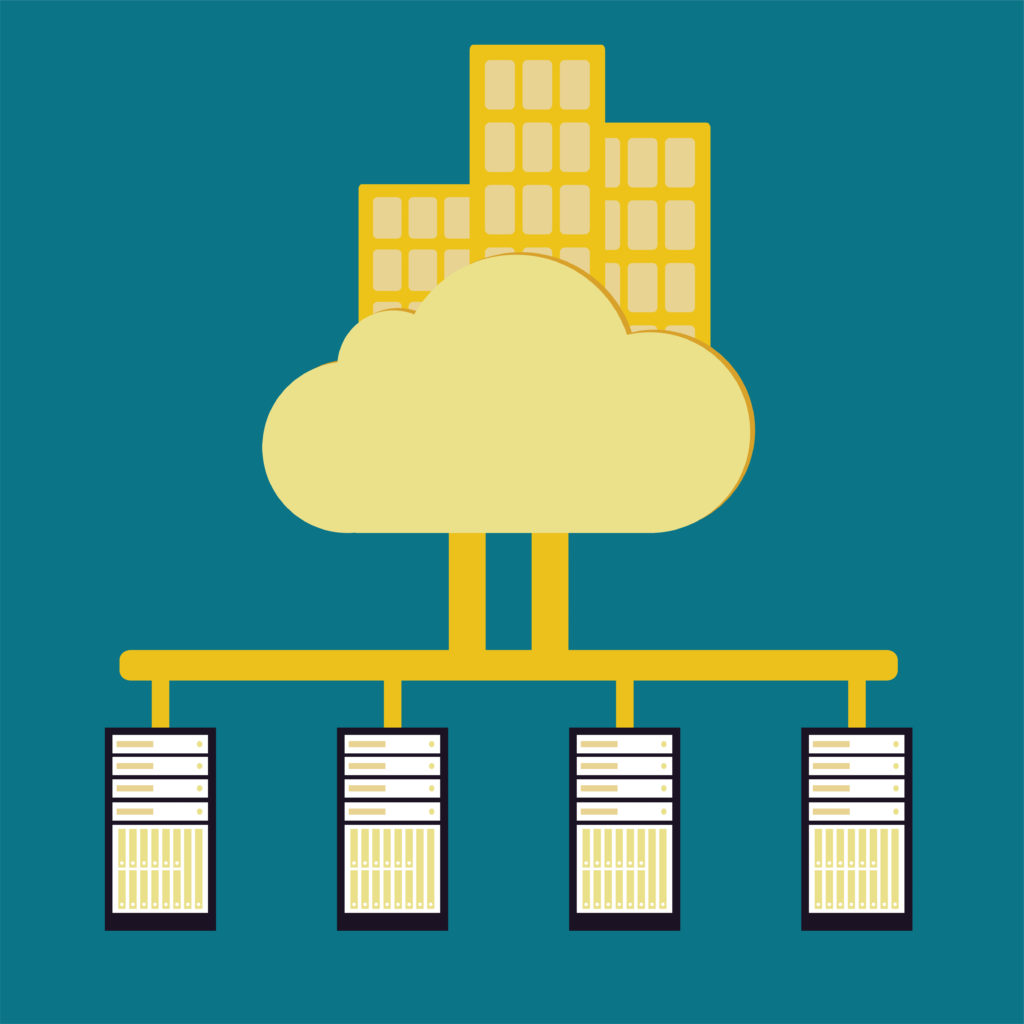
One of the most critical concepts in any scalable solution to understand is horizontal scaling. Basically, when scaling a solution we have two directions that we can scale in. We can scale vertically which means we are going to take our one system and make it bigger or we can scale horizontally which means that we can add more machines to the existing solution to help share the load with the previous node.
So let’s look at a simple web workload. We are going to make the assumption for a second that this is a static website (read: no server-side components, and no database backend requirement). This workload is literally the easiest workload to scale horizontally. This is because we just put the content on a new box, configure the webserver the same (read: automation) and then we add it to DNS and we move on. Now when we “add” it to DNS this means that we actually create an extra DNS record of type “A” with the IP address of the new system. When we do this it actually gets handled as round-robin DNS or “poor man’s load balancing” which basically means if you have 2 nodes in a DNS record that the response will alternate between the two records, this is not bad for distributing load (and it keeps working as you add more nodes – say 50) so if you have 2 nodes then each node will get 1/2 of your workload, if you have 50 then each node will get 1/50 of your workload. This, however, has a number of weaknesses.
Connection Distribution Versus Workload Distribution
Not all users are created equal, so in our simple example, you could have a user which generates 5kb of data transfer, and another one who generates 50kb of data transfer. This is 10x the workload. Now if you end up by complete randomness with a good portion of your users being serviced on one node which are 10x users, then that node has the potential to provide a poor experience due to having a higher number of active users then the other node. So while the connections get distributed with ultimate fairness ��� the workload does not.
Failover Capability
The largest weakness, in my opinion, is an inability to deal with failure scenarios. So since connections are distributed (1/2 and 1/50 in our examples) if we lose just one node, this means that we will lose the ability to provide services to the connections which will still be distributed among all of the nodes (including the failed one). This is because there is no concept of a health check in DNS in general. Route 53 actually has the concept of a failover record which fills this gap nicely for certain workloads. We will cover this in a later article.
Load Balancing
So enter load balancing. This enables us to have more intelligent workload distribution. Based on our workload we can determine how we want to distribute our traffic, Least Connection Count for example (this actually will monitor the state of existing connections, so instead of sending 1/2 of the connections it will send 1/2 of the Active Connections which keeps the current connections even across all nodes). Of course, there are still users that are 10x users but this ensures that our users will be routed to the quietest node at that time. Now combine this with health checks and the load balancer can mark a workload as unhealthy and thus choose to no longer route traffic to it until it becomes healthy again. This sort of capability protects your end users from experiencing and outage due to a single node failure.OK so now that we know the why let's create some resources.
Identify Our VPC, Subnet and Security Groups
This requires us to create resources in a network, so we need to know where we want that to be. I am using a demo account and such I only have the default VPC’s and subnets. If you have custom VPCs and specific subnet placement requirements you will want to ensure you use the correct resource ids. However, if you aren’t picky or if you can recognize them by the id, this command will save you some work. I am simplifying the output using Powershell if you are on bash those portions will not work, but you can manually parse the aws command yourself.
VPCs
PS> (aws ec2 describe-vpcs –region us-east-1 | ConvertFrom-Json).Vpcs.VpcId<br />
vpc-bfa608c4
Subnets
PS> (aws ec2 describe-subnets –region us-east-1 | ConvertFrom-Json).Subnets.SubnetId<br />
subnet-45b36c4a<br />
subnet-233dd569<br />
subnet-5d88ac00<br />
subnet-aa525fce<br />
subnet-ce0627e1<br />
subnet-ad742d92
Security Groups
PS> (aws ec2 describe-security-groups –region us-east-1 | ConvertFrom-Json).SecurityGroups.GroupId<br />
sg-205f1956<br />
sg-49e21d03<br />
sg-d49732a2<br />
sg-8b9d27c1<br />
sg-78a51f32
So here is a list of the resources we will use.
vpc-bfa608c4
subnet-45b36c4a
subnet-233dd569
sg-8b9d27c1
sg-78a51f32
You will only see one of the security groups in the setup, the other one is applied to our ec2 nodes and it allows the traffic from the load balancers to the web servers running on ec2.
Create Load Balancer
In order to create the load balancer we will need the following information:
- The desired name of the load balancer
- At least two subnets (in the same VPC)
- The security groups which allow traffic inbound from the client, and also that allow the ELB to communicate with the actual servers.
- The region in which to create the resource (which of course must be the same as the subnets and security groups.
Here is the basic syntax of the command.
$ aws elbv2 create-load-balancer –name [ load-balancer-name ] –subnets [ subnet1 subnet2 ] –security-groups [ security-group1 security-group2 ]–region [ region ]
In our example, our workload is going to be a couple of EC2 instances that are running apache over HTTP on port 80. This is going to be accessible via the internet at www.squirrelbox.io over HTTPS on port 443. When we have a configuration like this where the web tier itself doesn’t run SSL, but the load balancer does this is called SSL termination, basically we are terminating the LS at the load balancer to save CPU cycles on the web nodes themselves, reduce the management overhead of having SSL certificates on all of our web nodes, but this is with one big caveat, we must trust the network between the load balancer and the web nodes. In AWS this is not a problem due to the VPC architecture. However, if you have different requirements you can also look at using dedicated tenancy for your VPC and instances.
PS> aws elbv2 create-load-balancer –name squirrelbox-external –scheme internet-facing –ip-address-type ipv4 –subnets subnet-45b36c4a subnet-233dd569 –security-groups sg-8b9d27c1 –region us-east-1<br />
{<br />
"LoadBalancers": [<br />
{<br />
"IpAddressType": "ipv4",<br />
"VpcId": "vpc-bfa608c4",<br />
"LoadBalancerArn": "arn:aws:elasticloadbalancing:us-east-1:112233445566:loadbalancer/app/squirrelbox-external/df9f9a3bb1f5007a",<br />
"State": {<br />
"Code": "provisioning"<br />
},<br />
"DNSName": "squirrelbox-external-1261228970.us-east-1.elb.amazonaws.com",<br />
"SecurityGroups": [<br />
"sg-8b9d27c1"<br />
],<br />
"LoadBalancerName": "squirrelbox-external",<br />
"CreatedTime": "2018-07-21T16:29:24Z",<br />
"Scheme": "internet-facing",<br />
"Type": "application",<br />
"CanonicalHostedZoneId": "Z3XXXXXXXXXX7K",<br />
"AvailabilityZones": [<br />
{<br />
"SubnetId": "subnet-233dd569",<br />
"ZoneName": "us-east-1a"<br />
},<br />
{<br />
"SubnetId": "subnet-45b36c4a",<br />
"ZoneName": "us-east-1f"<br />
}<br />
]<br />
}<br />
]<br />
}
Once we have created it we need to refer back to it, for example to check the state and ensure it is active, or perhaps to pull the ARN for a subsequent action.
PS> (aws elbv2 describe-load-balancers –region us-east-1 | ConvertFrom-Json).LoadBalancers</p>
<p>IpAddressType : ipv4<br />
VpcId : vpc-bfa608c4<br />
LoadBalancerArn : arn:aws:elasticloadbalancing:us-east-1:112233445566:loadbalancer/app/squirrelbox-external/df9f9a3bb1f5007a<br />
State : @{Code=active}<br />
DNSName : squirrelbox-external-1261228970.us-east-1.elb.amazonaws.com<br />
SecurityGroups : {sg-8b9d27c1}<br />
LoadBalancerName : squirrelbox-external<br />
CreatedTime : 2018-07-21T16:29:24Z<br />
Scheme : internet-facing<br />
Type : application<br />
CanonicalHostedZoneId : Z3XXXXXXXXXX7K<br />
AvailabilityZones : {@{SubnetId=subnet-233dd569; ZoneName=us-east-1a}, @{SubnetId=subnet-45b36c4a; ZoneName=us-east-1f}}
I often find myself needing the ARN (we will use it a few more times in this article) so I like to find ways to shortcut that output. This will return just the ARN on Powershell.
PS> (aws elbv2 describe-load-balancers –region us-east-1 | ConvertFrom-Json).LoadBalancers.LoadBalancerArn<br />
arn:aws:elasticloadbalancing:us-east-1:112233445566:loadbalancer/app/squirrelbox-external/df9f9a3bb1f5007a
Keep this ARN handy we will use it later.
Create Target Group
So now we have created a load balancer, well the next step is to create a target group, this is essentially the collection of backend services that will represent a single workload. So in our simple example of a web server, we might have 4 back end ec2 instances that would-be members on port 80. However, it is also important to note that you can have different ports in the same target group. This is especially helpful when it comes to containers. Here is the basic syntax of the command.
$ aws elbv2 create-target-group –name [ target-group-name ] –protocol [ HTTP | HTTPS ] –port [ PORT ] –vpc-id [ vpc-id] –region [ region ]
Now when we create the target group we simply need a name, VPC, and the protocol and port combination.
PS> aws elbv2 create-target-group –name squirrelbox-webnodes –protocol HTTP –port 80 –vpc-id vpc-bfa608c4 –region us-east-1<br />
{<br />
"TargetGroups": [<br />
{<br />
"HealthCheckPath": "/",<br />
"HealthCheckIntervalSeconds": 30,<br />
"VpcId": "vpc-bfa608c4",<br />
"Protocol": "HTTP",<br />
"HealthCheckTimeoutSeconds": 5,<br />
"TargetType": "instance",<br />
"HealthCheckProtocol": "HTTP",<br />
"UnhealthyThresholdCount": 2,<br />
"HealthyThresholdCount": 5,<br />
"TargetGroupArn": "arn:aws:elasticloadbalancing:us-east-1:112233445566:targetgroup/squirrelbox-webnodes/2ad2df8c47d5a0fd",<br />
"Matcher": {<br />
"HttpCode": "200"<br />
},<br />
"HealthCheckPort": "traffic-port",<br />
"Port": 80,<br />
"TargetGroupName": "squirrelbox-webnodes"<br />
}<br />
]<br />
}
After creating it we might need to refer back to it to check the settings.
PS> (aws elbv2 describe-target-groups –region us-east-1 | ConvertFrom-Json).TargetGroups</p>
<p>HealthCheckPath : /<br />
HealthCheckIntervalSeconds : 30<br />
VpcId : vpc-bfa608c4<br />
Protocol : HTTP<br />
HealthCheckTimeoutSeconds : 5<br />
TargetType : instance<br />
HealthCheckProtocol : HTTP<br />
LoadBalancerArns : {}<br />
UnhealthyThresholdCount : 2<br />
HealthyThresholdCount : 5<br />
TargetGroupArn : arn:aws:elasticloadbalancing:us-east-1:112233445566:targetgroup/squirrelbox-webnodes/2ad2df8c47d5a0fd<br />
Matcher : @{HttpCode=200}<br />
HealthCheckPort : traffic-port<br />
Port : 80<br />
TargetGroupName : squirrelbox-webnodes
This will return just the ARN of the target group.
PS> (aws elbv2 describe-target-groups –region us-east-1 | ConvertFrom-Json).TargetGroups.TargetGroupArn<br />
arn:aws:elasticloadbalancing:us-east-1:112233445566:targetgroup/squirrelbox-webnodes/2ad2df8c47d5a0fd
Keep this ARN handy we will use it later.
Create Listener
Next, we must create the listener, the listener does exactly that it listens for the customer traffic. So this is going to declare the external protocols and associate a certificate (if appropriate) with the load balancer.
Here is the basic syntax of the command.
$ aws elbv2 create-listener –load-balancer-arn [ load-balancer-arn ] –protocol [ HTTP | HTTPS ] –port [ port-number ] –certificates "CertificateArn=[ certificate-arn ]" –default-actions "Type=forward,TargetGroupArn=[ target-group-arn ] –region [ region ]
The listener will setup the external listening port on the load balancer, and associate a certificate as well as create a default rule referring to the target group we declare.
PS> aws elbv2 create-listener –load-balancer-arn arn:aws:elasticloadbalancing:us-east-1:11223344556:loadbalancer/app/squirrelbox-external/df9f9a3bb1f5007a –protocol HTTPS –port 443 –certificates CertificateArn=arn:aws:acm:us-east-1:310843369992:certificate/0e8046d4-3625-49ff-9fee-c1485e314dc7 –default-actions Type=forward,TargetGroupArn=arn:aws:elasticloadbalancing:us-east-1:310843369992:targetgroup/squirrelbox-webnodes/2ad2df8c47d5a0fd –region us-east-1<br />
{<br />
"Listeners": [<br />
{<br />
"Protocol": "HTTPS",<br />
"DefaultActions": [<br />
{<br />
"TargetGroupArn": "arn:aws:elasticloadbalancing:us-east-1:112233445566:targetgroup/squirrelbox-webnodes/2ad2df8c47d5a0fd",<br />
"Type": "forward"<br />
}<br />
],<br />
"SslPolicy": "ELBSecurityPolicy-2016-08",<br />
"Certificates": [<br />
{<br />
"CertificateArn": "arn:aws:acm:us-east-1:112233445566:certificate/0e8046d4-3625-49ff-9fee-c1485e314dc7"<br />
}<br />
],<br />
"LoadBalancerArn": "arn:aws:elasticloadbalancing:us-east-1:112233445566:loadbalancer/app/squirrelbox-external/df9f9a3bb1f5007a",<br />
"Port": 443,<br />
"ListenerArn": "arn:aws:elasticloadbalancing:us-east-1:112233445566:listener/app/squirrelbox-external/df9f9a3bb1f5007a/862c694eafb01c83"<br />
}<br />
]<br />
}
Here we can check the listener’s configuration after its creation.
PS> (aws elbv2 describe-listeners –load-balancer-arn arn:aws:elasticloadbalancing:us-east-1:112233445566:loadbalancer/app/squirrelbox-external/df9f9a3bb1f5007a –region us-east-1 | ConvertFrom-Json).Listeners</p>
<p>Protocol : HTTPS<br />
DefaultActions : {@{TargetGroupArn=arn:aws:elasticloadbalancing:us-east-1:112233445566:targetgroup/squirrelbox-webnodes/2ad2df8c47d5a0fd; Type=forward}}<br />
SslPolicy : ELBSecurityPolicy-2016-08<br />
Certificates : {@{CertificateArn=arn:aws:acm:us-east-1:112233445566:certificate/0e8046d4-3625-49ff-9fee-c1485e314dc7}}<br />
LoadBalancerArn : arn:aws:elasticloadbalancing:us-east-1:112233445566:loadbalancer/app/squirrelbox-external/df9f9a3bb1f5007a<br />
Port : 443<br />
ListenerArn : arn:aws:elasticloadbalancing:us-east-1:112233445566:listener/app/squirrelbox-external/df9f9a3bb1f5007a/862c694eafb01c83
Of course we can also just display the ARN.
PS> (aws elbv2 describe-listeners –load-balancer-arn arn:aws:elasticloadbalancing:us-east-1:112233445566:loadbalancer/app/squirrelbox-external/df9f9a3bb1f5007a –region us-east-1 | ConvertFrom-Json).Listeners.ListenerArn<br />
arn:aws:elasticloadbalancing:us-east-1:112233445566:listener/app/squirrelbox-external/df9f9a3bb1f5007a/862c694eafb01c83
Keep this ARN handy we will use it later.
Create Rule
If you have complicated load balancing requirements (multi-tenant, api endpoints, etc) then rules will be your friend. Anything that you want to route differently than the default will need its own rule and this will be how that traffic is controlled.
Here is the basic syntax of the command.
$ aws elbv2 create-rule –listener-arn [ listener-arn ] –conditions "Field=[ path-pattern | host-header ],Values=[ /squirrelbox/* | www.squirrelbox.io ]" –actions "Type=forward,TargetGroupArn=[ target-group-arn ]" –priority 1 –region [ region ]
Here we are going to set a host-header rule so that anything that comes in via the name www.squirrelbox.io will get routed to a specific target group.
PS> aws elbv2 create-rule –listener-arn arn:aws:elasticloadbalancing:us-east-1:112233445566:listener/app/squirrelbox-external/df9f9a3bb1f5007a/862c694eafb01c83 –conditions "Field=host-header,Values=www.squirrelbox.io" –actions "Type=forward,TargetGroupArn=arn:aws:elasticloadbalancing:us-east-1:112233445566:targetgroup/squirrelbox-webnodes/2ad2df8c47d5a0fd" –priority 1 –region us-east-1<br />
{<br />
"Rules": [<br />
{<br />
"Priority": "1",<br />
"Conditions": [<br />
{<br />
"Field": "host-header",<br />
"Values": [<br />
"www.squirrelbox.io"<br />
]<br />
}<br />
],<br />
"RuleArn": "arn:aws:elasticloadbalancing:us-east-1:112233445566:listener-rule/app/squirrelbox-external/df9f9a3bb1f5007a/862c694eafb01c83/3303294d17235cd9",<br />
"IsDefault": false,<br />
"Actions": [<br />
{<br />
"TargetGroupArn": "arn:aws:elasticloadbalancing:us-east-1:112233445566:targetgroup/squirrelbox-webnodes/2ad2df8c47d5a0fd",<br />
"Type": "forward"<br />
}<br />
]<br />
}<br />
]<br />
}
Let’s describe the rules we now have.
PS> (aws elbv2 describe-rules –listener-arn arn:aws:elasticloadbalancing:us-east-1:112233445566:listener/app/squirrelbox-external/df9f9a3bb1f5007a/862c694eafb01c83 –profile entasisawsug | ConvertFrom-Json).Rules</p>
<p>Priority : 1<br />
Conditions : {@{Field=host-header; Values=System.Object[]}}<br />
RuleArn : arn:aws:elasticloadbalancing:us-east-1:112233445566:listener-rule/app/squirrelbox-external/df9f9a3bb1f5007a/862c694eafb01c83/3303294d17235cd9<br />
IsDefault : False<br />
Actions : {@{TargetGroupArn=arn:aws:elasticloadbalancing:us-east-1:112233445566:targetgroup/squirrelbox-webnodes/2ad2df8c47d5a0fd; Type=forward}}</p>
<p>Priority : default<br />
Conditions : {}<br />
RuleArn : arn:aws:elasticloadbalancing:us-east-1:112233445566:listener-rule/app/squirrelbox-external/df9f9a3bb1f5007a/862c694eafb01c83/e8a9ec74d438b479<br />
IsDefault : True<br />
Actions : {@{TargetGroupArn=arn:aws:elasticloadbalancing:us-east-1:112233445566:targetgroup/squirrelbox-webnodes/2ad2df8c47d5a0fd; Type=forward}}
Additional Certificates
If you have multiple hostnames on the same load balancers you will likely need to have multiple certificates associated with the listener so that it can use SNI to apply the correct cert. Here is how you would add a second one.
Here is the basic syntax of the command.
PS> aws elbv2 add-listener-certificates –listener-arn [ listener-arn ] –certificates CertificateArn=[ certificate-arn ] –region [ region ]
Here we will add a second certificate for another domain, this one is for www2.squirrelbox.io.
PS> aws elbv2 add-listener-certificates –listener-arn arn:aws:elasticloadbalancing:us-east-1:112233445566:listener/app/squirrelbox-external/df9f9a3bb1f5007a/8 62c694eafb01c83 –certificates CertificateArn=arn:aws:acm:us-east-1:112233445566:certificate/b9625a00-9b05-4d4f-81e3-5084d8f8bd59 –region us-east-1<br />
{<br />
"Certificates": [<br />
{<br />
"CertificateArn": "arn:aws:acm:us-east-1:112233445566:certificate/b9625a00-9b05-4d4f-81e3-5084d8f8bd59",<br />
"IsDefault": false<br />
}<br />
]<br />
}
So with all of these components this can enable us to horizontally scale our applications as we need to increase our capabilities. This is one of the core components to a Scalable Solution. For additional learning I suggest you look into healthchecks and registering instances into a target group. Of course you can also follow me on LinkedIn to be notified of our latest articles.


